Applicable plans
- Free
- Plus
- Business
- Enterprise
Zapier can support even more complex tasks by allowing you to create multi-step Zaps. Let’s say, for example, you use Google calendar to share your work schedule, and you’d like any new events or changes to your Google Calendar to be updated in Zenkit. To support this, you’ll need to set up a Zap with three steps:
- Trigger when a Calendar event is created or updated.
- Search for an item in Zenkit that matches the event, and create one if not found.
- Update a Zenkit item with the data from the updated event in Google Calendar.
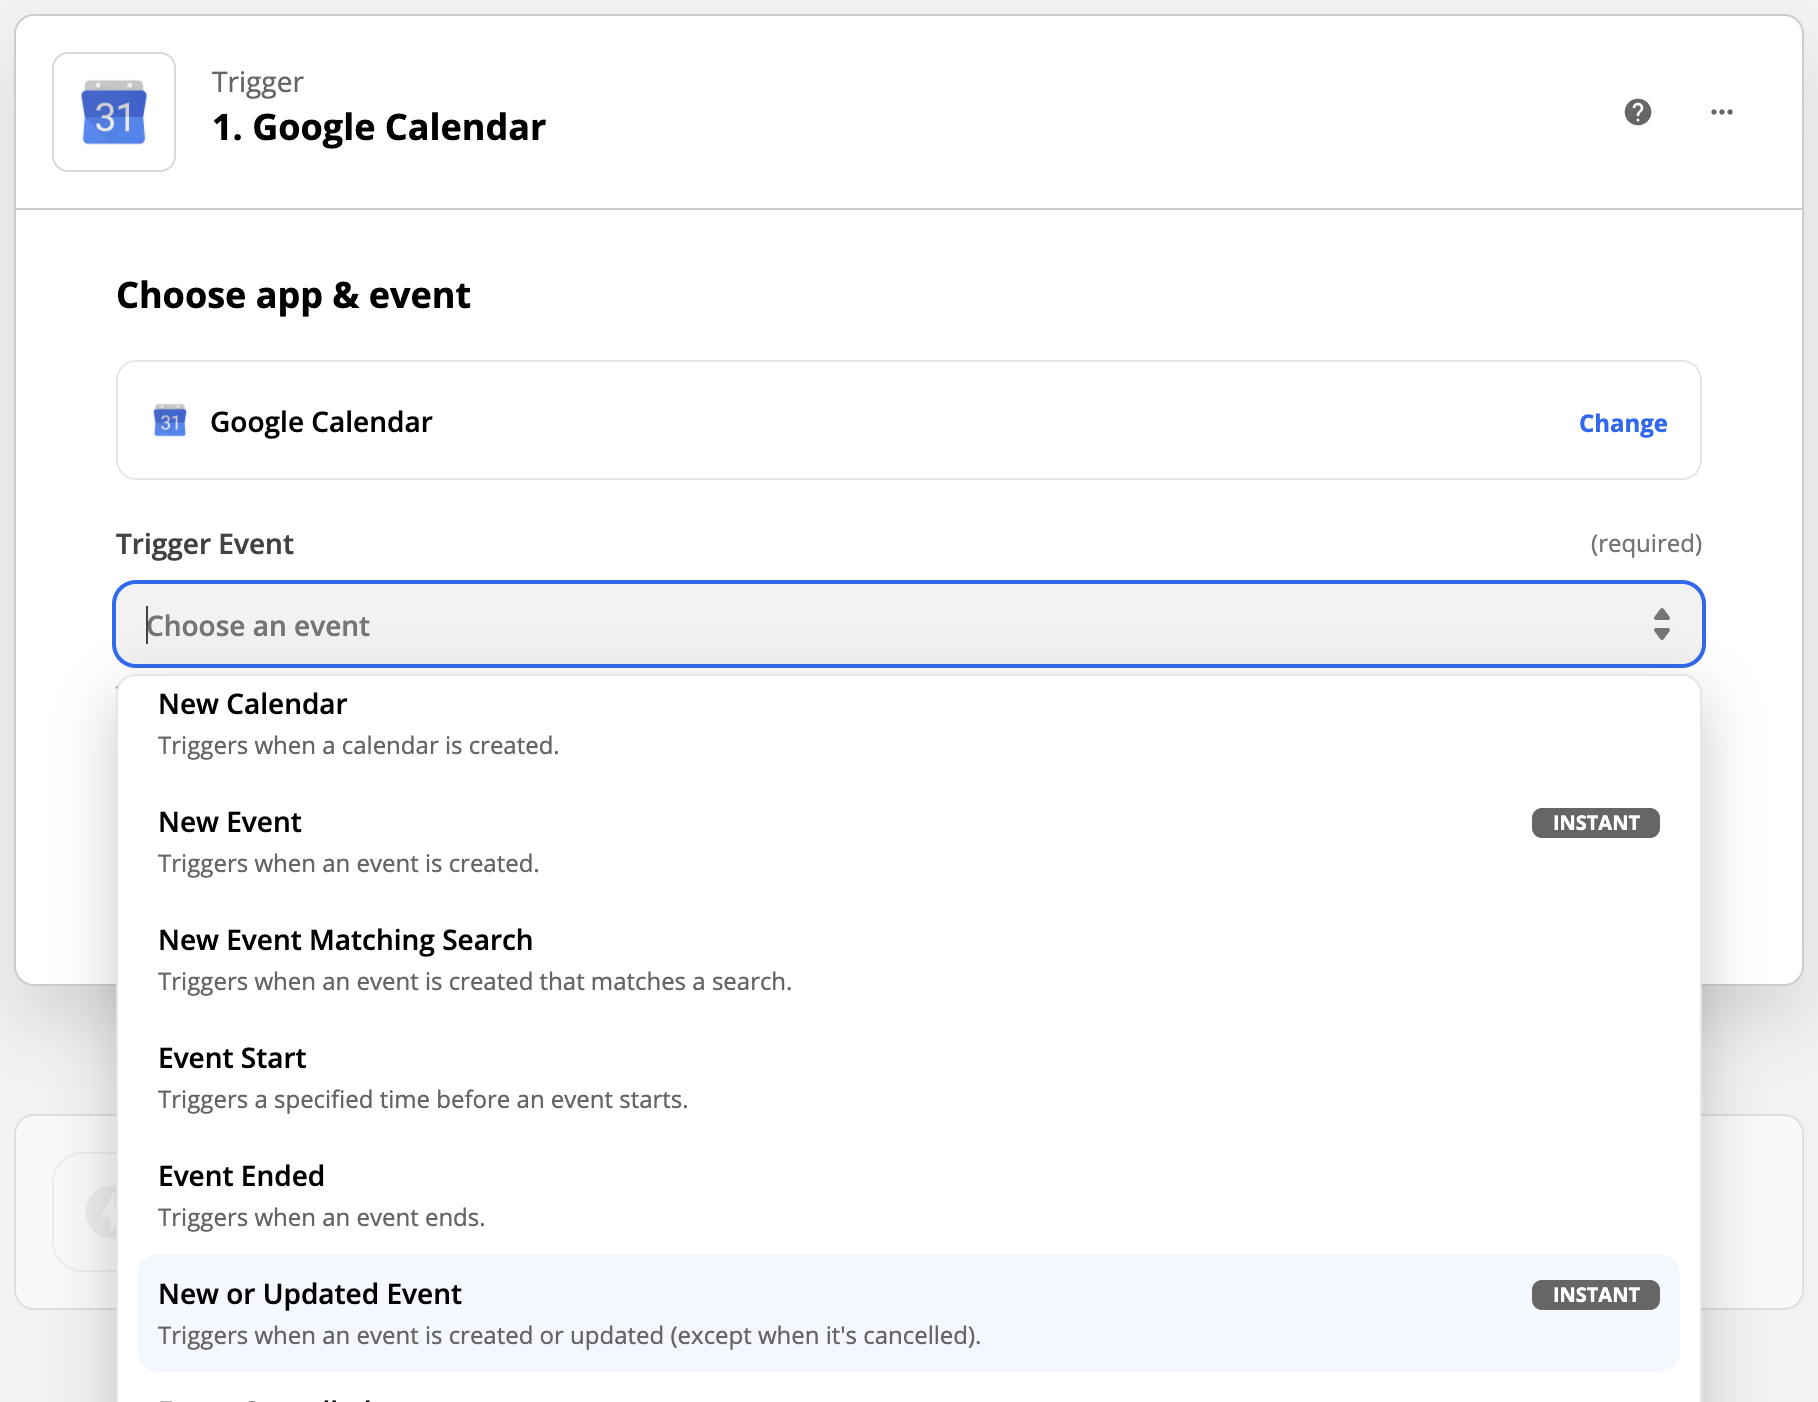
The first step is to set up Google Calendar as your trigger. Select ‘New or Updated Event’, then click ‘Save + Continue’.
Select the Google Calendar Account you want to use, then select the calendar from that account that you’d like to use.
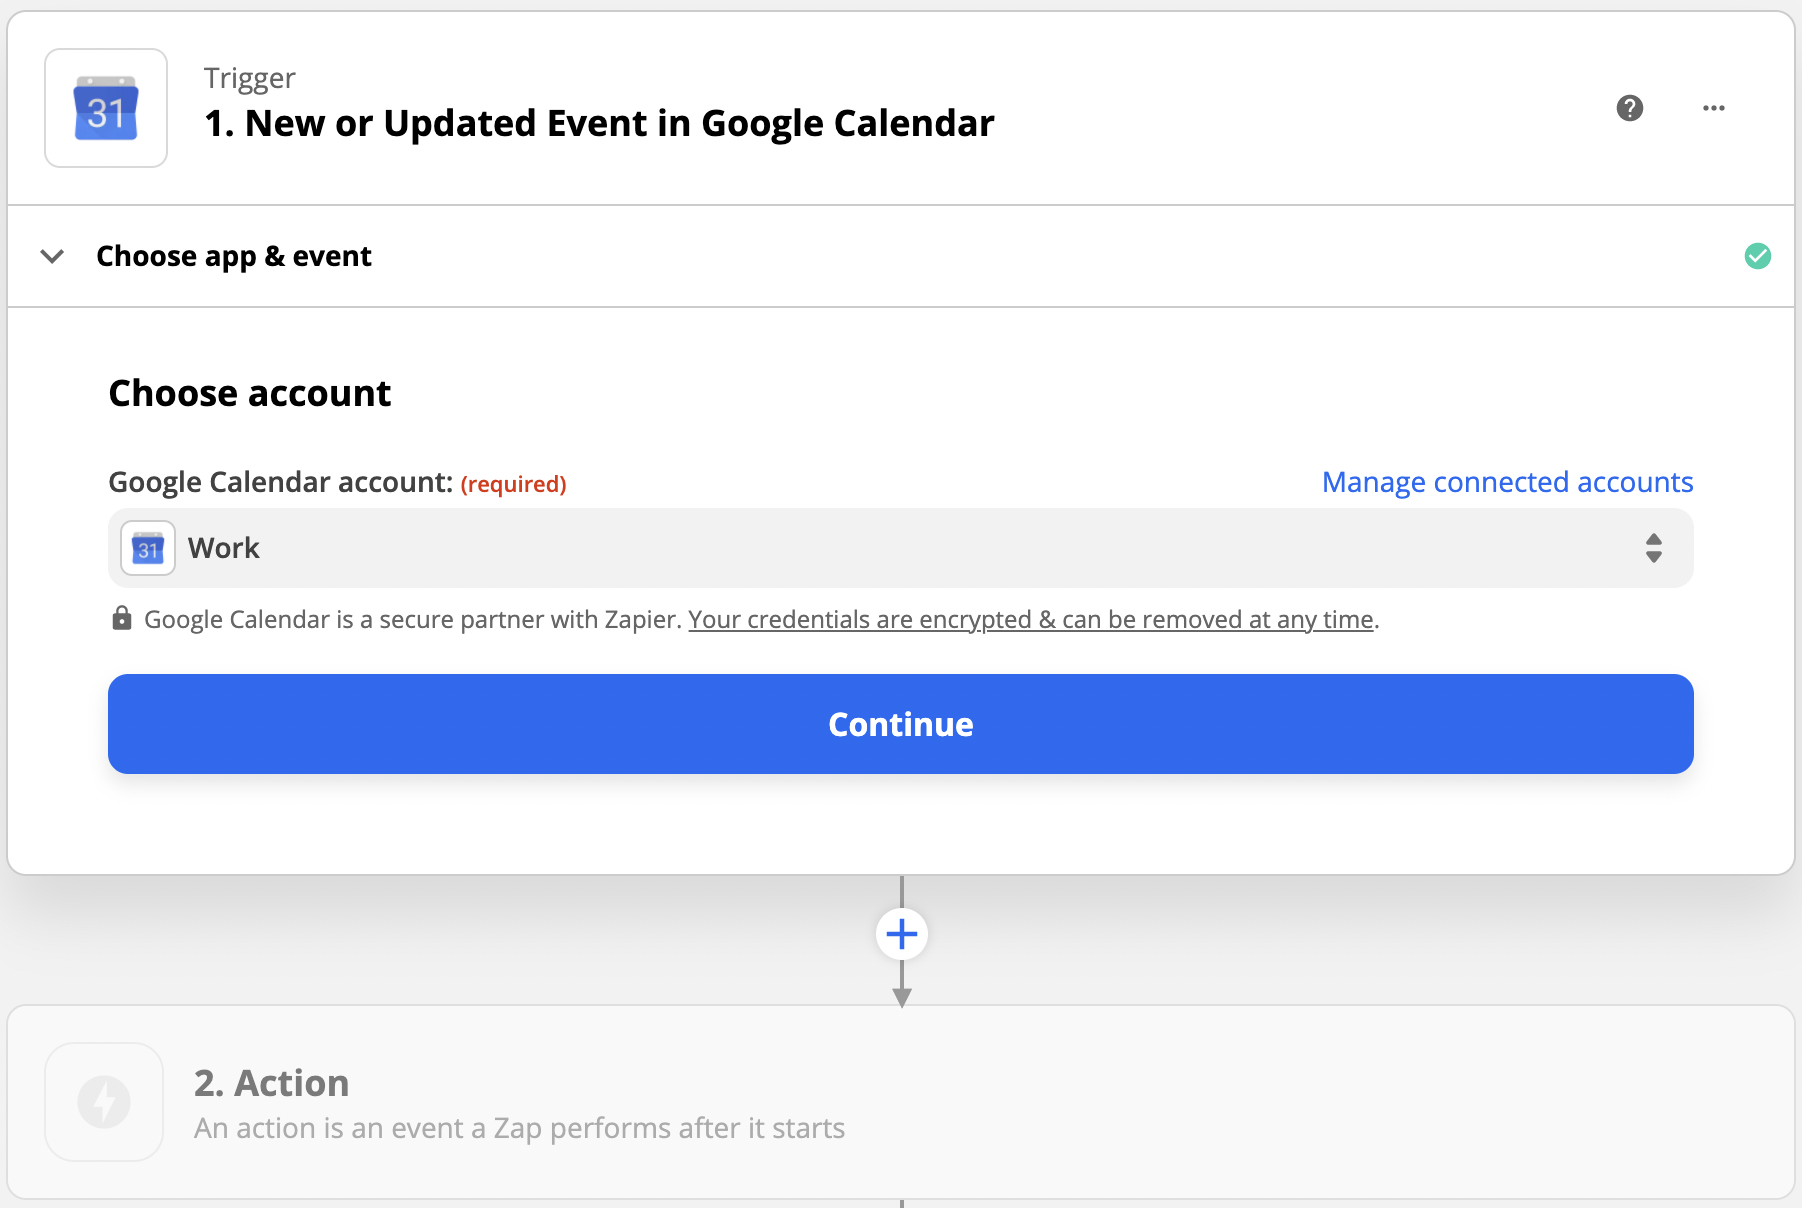
Test the step, check the event and then click ‘Continue’ to create the second step. 
Step 2 – Search and Create Item
In the second step, you’ll be searching your Zenkit list to see if there are any items that match the results of the first step. Select Zenkit from the list of apps, then choose ‘Find Item’.

Pick the Zenkit account you want to use, then tell Zapier which List & Fields to search. The ‘Search Text’ box then lets you choose a field from the first step to use instead of a generic search term. 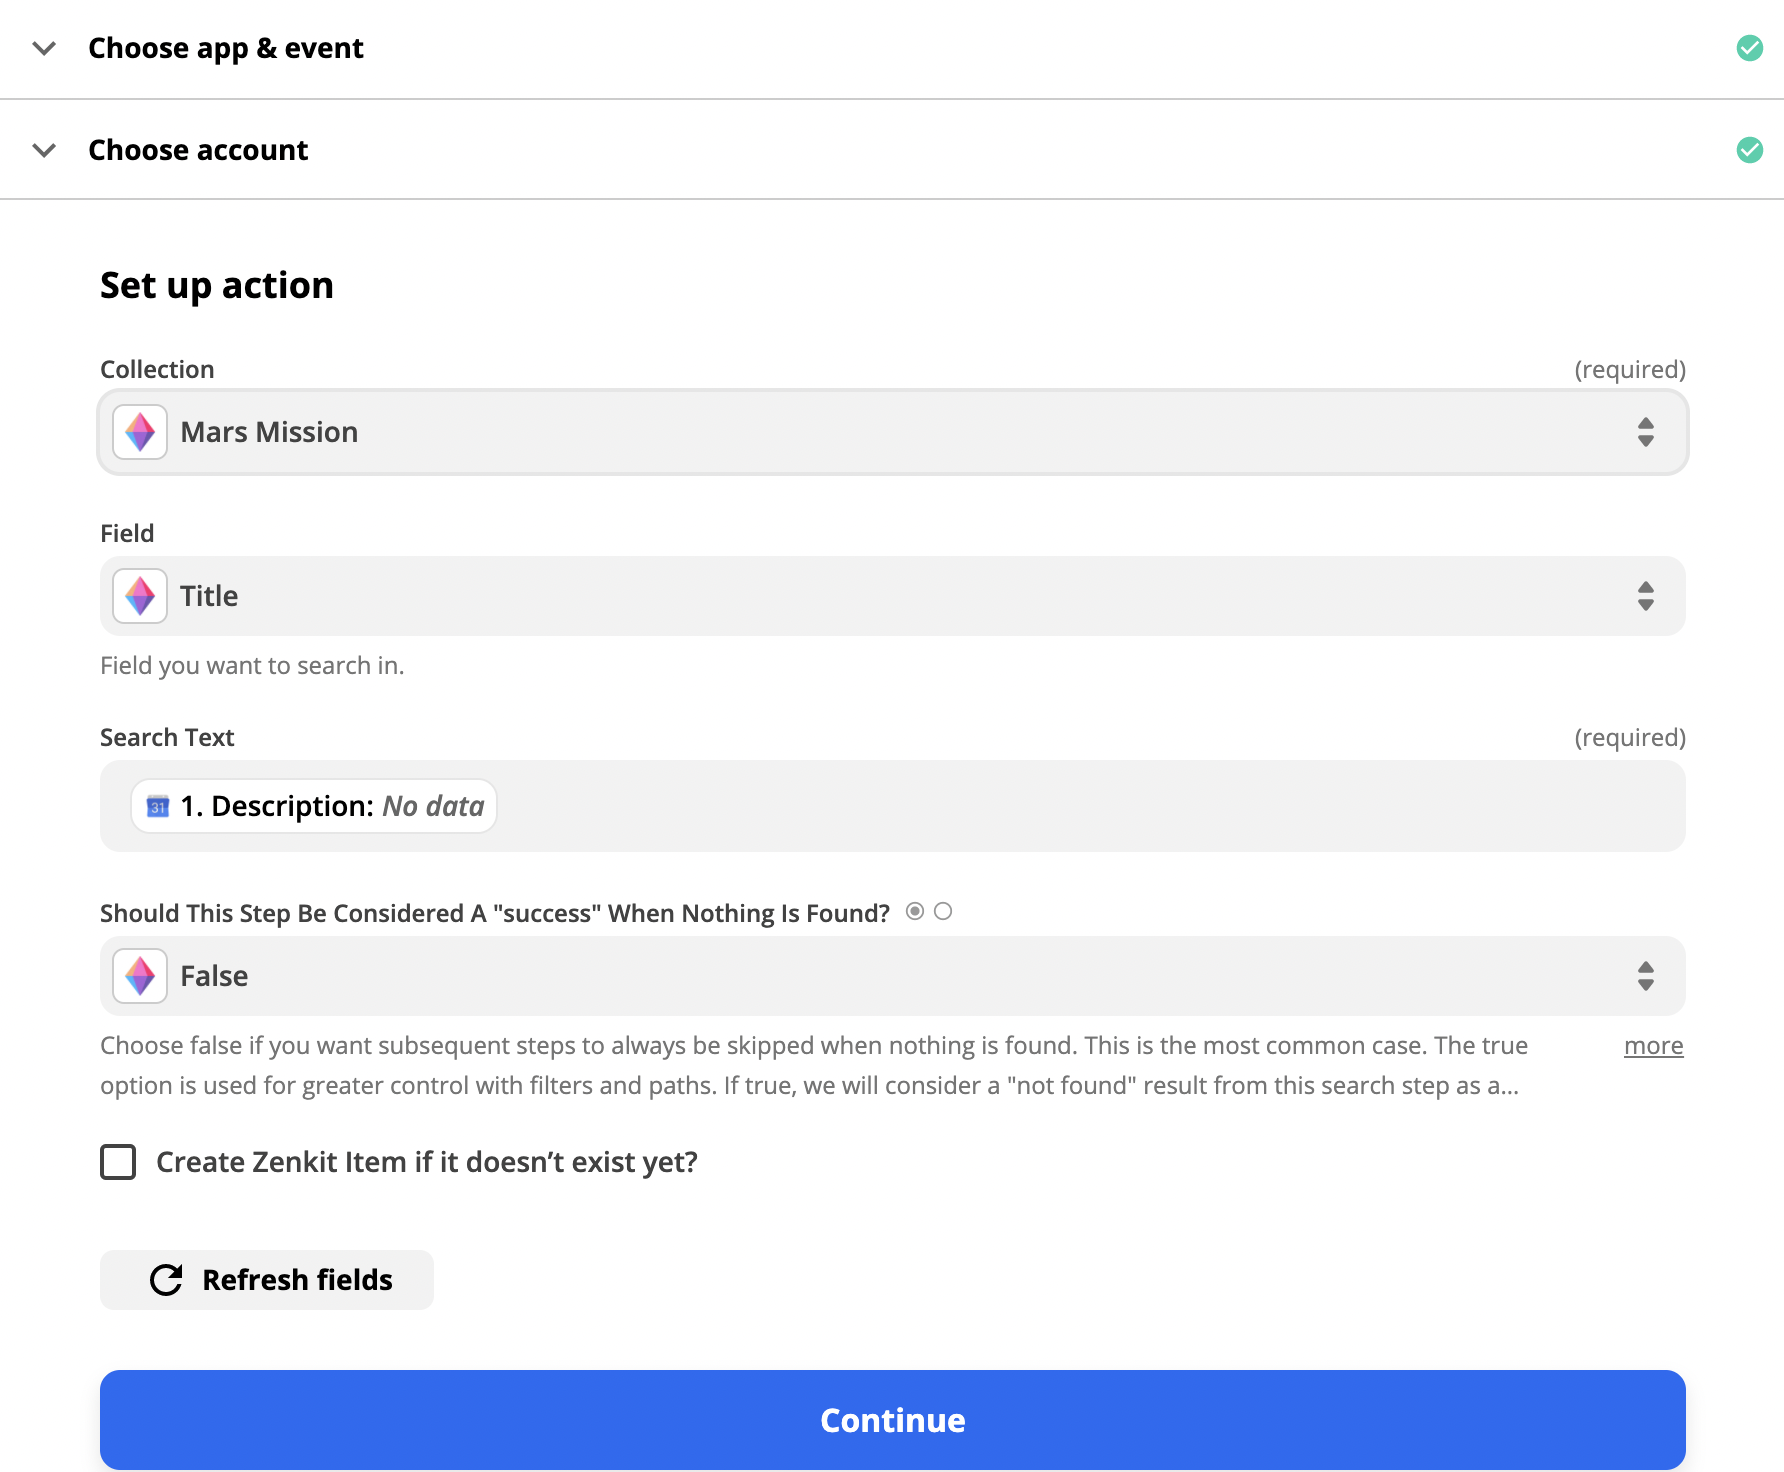
Check the box next to ‘Create Zenkit Item if it doesn’t exist yet?’. You’ll then be able to choose which fields to map from Google Calendar to the item in Zenkit.
Then test the step to make sure it works. You’ll see your example search and an example of the item it would create if the search doesn’t find it.

At the last stage, click ‘Add a step’ instead of ‘Finish’ to add the final ‘Update item’ step of your multi-step Zap. 
Step 3 – Update Zenkit Item
Again, choose Zenkit as your action app. This time, select ‘Update Item’ as the action.

Pick the same Zenkit account you used in the last step, then set up the template. Pick the same list as you did in the last step, then under ‘Item’ select ‘Use a Custom Value’. Under ‘Custom Value for Item Short ID’ Pick ‘ID’ from the list, as directed. This ensures that the item you update is the item that was found or created in the second step. 
You can then choose how the fields should be updated, and select the data that you’d like to add to the fields. Select the fields you gathered from Google Calendar in step one. 
Test your last Zap step, then if there isn’t an issue, click ‘Finish’. Turn your Zap on by clicking the toggle! Now you’ve saved yourself the hassle of keeping two apps up to date manually, and you can apply this same method to lots of other apps too! 
Other Options
Instead of using a search or action in the second step, you can use a Zapier filter instead. Click the small plus button and click ‘Filter’.
Click ‘Continue’ on the next stage (your only option is to set a filter to ‘Only continue if…’). Here you can select any number of number of filters and combine them using ‘AND’ & ‘OR’ operators. 
Then, as usual, test the step and continue on with your Zap!